
First go to:
http://www.raspberrypi.org/downloads
And download Raspbian Image 2013-09-10-wheezy-raspbian.zip
And download Raspbian Image 2013-09-10-wheezy-raspbian.zip
Download also Win32DiskImager from the same site. Extract the Win32DiskImager somewhere on your computer for example Desktop.
Insert your memory card into computer.
Open the DiskImager software, press the icon that looks like a folder and search for your raspbian image. Also check that the device is pointing to your memory card. Click write.

After the file is writed click OK and insert it to your raspberry Pi. Then plug in all the cables and power plug at last. It should boot up and show you the raspberry pi config window.

1. First select Expand Filesystem if you want to use whole memory card as disk space and often people do. The space is created after next reboot.
2. If you want to change the PI account default password select this. Default password is raspberry
4. Select keyboard layout from here and system time settings.

7. Overclocking is a new tool, you can overclock your raspberry pi and it is so simple check it out!
8. Then go to advanced options if you are going to use raspberry pi as a server, otherwise you are ready and can skip few next steps.

From advanced options it is good to set up hostname for your server. It sets the visible name for PI on your local network (A2).
(A3) Memory split, with this option you can select how much memory is dedicated to the GPU if you are using the graphical user interface you should give it as much memory as possible. We are going to set up a server so I'm going to use only command line and therefore I set up it as low as possible, in this case 16mb.
(A4) SSH, if you want to acces your server from other computer you have to turn this on. We are going to configure our server from windows computer so set this on.
Now you are finished. Go back and finish. If it doesn't reboot just pull the plug off the PI and in again.
Now it should show you the raspberry pi terminal:

Just to make sure type service ssh status to see if the service has started.

Then check your IP address by typing ifconfig

Look for a line which says: inet addr: write down the ip after that. It's the IP your router has given to PI.
Then you can pull off all the cables but power and ethernet. Your PI is ready to be configured from other computer. However if you would like to use the graphical environment type startx in the terminal window and it should load.

Go to your windows computer and download putty.exe http://www.chiark.greenend.org.uk/~sgtatham/putty/download.html
In putty window type your PI ip address we just looked before and leave port 22. Then connect.

Pi should ask your password and after you have entered it you should see the welcome message

Security
Now we want to make our server as secure as possible. Lets add a new user and delete the default PI account.
type sudo useradd -m accountname where "accountname" is your account name.
Set password for your account type: sudo passwd accountname
Now lets add our new account to same groups as PI. type sudoedit /etc/group
Go through the file adding your account ,accountname to the end of all the groups that pi is in. For example my account name is shnigi.

When you are ready press CTRL + O to save, press enter and then CTRL + X to quit nano. All nano command are visible in the bottom of the terminal screen. Mark ^ means CTRL + letter. Of course if you just want to add other user in PI you don't need to go through this file. Now type exit and try to log in your other account. It should give you the welcome message again.
Next set the default shell for your new account when you have logged in with it. Type:
chsh -s /bin/bash
After this you could delete the PI account if it is no longer required. Of course there are also a lot of other aspects to make PI more secure.
Setting up the networking
Next step is to give the Raspberry Pi an static IP address. This is a little more complex as it depends upon your own setup and router. How to configure your router I suggest you to check: http://portforward.com/ for more information. This article is only about Raspberry Pi.
If you again type ifconfig to the terminal it will show your address in eth0

Also check your router address by typing route

To change to static IP address type
cd /etc/network
sudo nano interfaces
replace the line "iface eth0 inet dhcp" like in this picture. Of course use your addresses from the earlier steps we just did.

CTRL + O to save CTRL + X to exit nano. Next type cd .. and nano resolv.conf to make sure your nameserver is set up correctly.
Next it is good idea to reboot the pi with sudo reboot wait few minutes and connect again with putty. After logging in check using ifconfig to confirm that you have a static IP address. All done. Now just set up your router and start installing LAMP for example.
start by updating repositories:
sudo apt-get update
Install apache web server
sudo apt-get install apache2
Install MySQL server
sudo apt-get install mysql-server
during the installation mysql asks to set root password.

Perl is installed as part of the operating system so just add php.
sudo apt-get install php5
sudo apt-get install php5-mysql
LAMP stack is now installed. You can check if you see the apache welcome page by pointing your browser to PI's IP address.

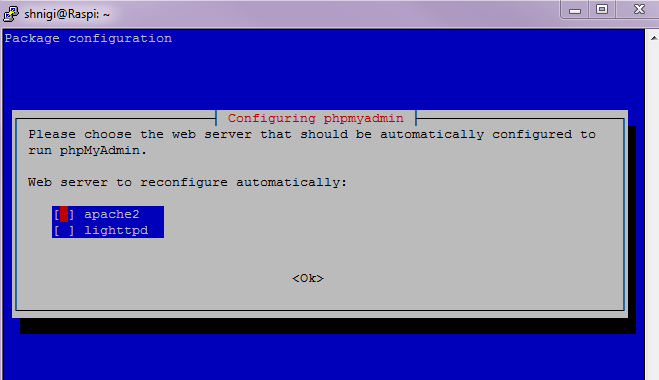
Next we are going to install phpmyadmin graphical user interface for MySQL
sudo apt-get install phpmyadmin
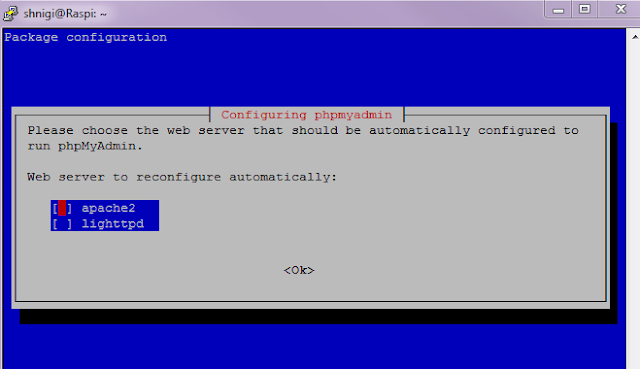
it will ask web server to configure, select apache2. It will also ask to create database, select yes.
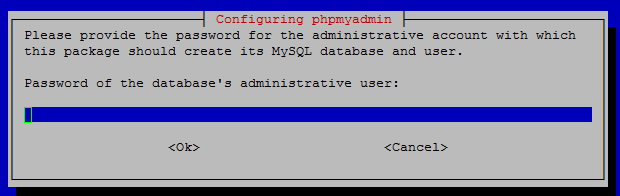
Set phpmyadmin password.

Create a symbolic link for phpmyadmin to be accessed from the internet. If you want more secure server skip this step. Phpmyadmin propably has some sort or risks and it is always more secure to use it locally.
sudo ln -s /usr/share/phpmyadmin/ /var/www/phpmyadmin
Then restart apache to take changes
sudo service apache2 restart
 type http://yourPi-IP/phpmyadmin to acces your phpmyadmin
sudo apt-get install php5
sudo apt-get install php5-mysql
LAMP stack is now installed. You can check if you see the apache welcome page by pointing your browser to PI's IP address.

sudo apt-get install phpmyadmin
it will ask web server to configure, select apache2. It will also ask to create database, select yes.
Set phpmyadmin password.
Create a symbolic link for phpmyadmin to be accessed from the internet. If you want more secure server skip this step. Phpmyadmin propably has some sort or risks and it is always more secure to use it locally.
sudo ln -s /usr/share/phpmyadmin/ /var/www/phpmyadmin
Then restart apache to take changes
sudo service apache2 restart

Test if php is working:
sudoedit /var/www/index.php
Insert this code:
<html>
 <head>
  <title>PHP Test</title>
 </head>
 <body>
 <?php echo '<p>Hello World</p>'; ?>
 </body>
</html>
Save and quit nano. Type to your browser: localhost/index.php
If you see this, it works:

Ei kommentteja:
Lähetä kommentti